There’s nothing quite like the aroma of freshly baked waffles wafting through the kitchen on a lazy Sunday morning. But when those waffles are infused with the rich, decadent flavors of red velvet, it takes the experience to a whole new level. That’s exactly what happened a few weekends ago when I decided to surprise my family with a batch of homem’t Red Velvet Marble Waffles.
I remember the excitement in my daughter’s eyes as she bounded into the kitchen, drawn by the captivating scarlet hue of the batter. “Mommy, are those red velvet waffles?” she exclaimed, her grin widening with each passing second. I couldn’t help but chuckle at her enthusiasm, and as I poured the batter onto the hot waffle iron, the sizzling sound only added to the anticipation.
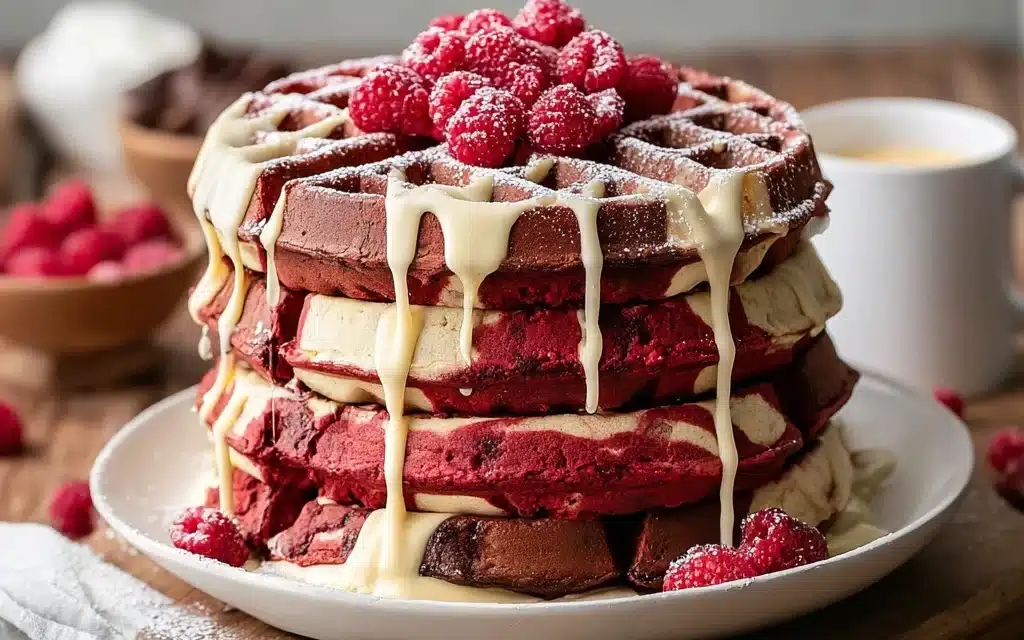
It wasn’t long before the first batch was ready, and the moment we took that first bite, it was pure bliss. The contrast of the deep cocoa notes and the vibrant red velvet swirls was simply divine, and the fluffy, airy texture of the waffles was the perfect canvas for this flavor explosion. Needless to say, the rest of the family was just as enamored with these Red Velvet Marble Waffles as my daughter and I were.
Why This Red Velvet Marble Waffles Recipe Will Become Your Go-To
The Secret Behind Perfect Red Velvet Marble Waffles
What sets this Red Velvet Marble Waffles recipe apart is the attention to detail and the perfect balance of flavors. By carefully combining the right ingredients and using a unique marbling technique, we’ve created a waffle that is not only visually stunning but also incredibly delicious.
The secret lies in the careful incorporation of the red food coloring, which not only gives the waffles their vibrant hue but also enhances the natural cocoa flavor. The addition of buttermilk adds a subtle tanginess that perfectly complements the sweetness of the sugar and the richness of the melted butter. And the baking soda? It’s the key to achieving that light, airy texture that makes these waffles simply irresistible.
Essential Ingredients You’ll Need
To make these Red Velvet Marble Waffles, you’ll need the following ingredients:
- 2 cups all-purpose flour: The foundation of the waffles, providing structure and texture.
- 2 tablespoons cocoa powder: Responsible for the deep, rich chocolate flavor that’s the hallmark of red velvet.
- 1 cup granulated sugar: Sweetens the batter and balances the acidity of the buttermilk.
- 1 teaspoon baking soda: Helps the waffles rise and achieve that light, airy texture.
- 1/2 teaspoon salt: Enhances the overall flavor and balances the sweetness.
- 2 cups buttermilk: Adds a delightful tangy note and contributes to the fluffy texture.
- 2 large eggs: Binds the ingredients together and provides structure.
- 1/2 cup unsalted butter, melted: Adds richness and moisture to the waffles.
- 2 tablespoons red food coloring: The secret to the iconic red velvet hue.
Step-by-Step Red Velvet Marble Waffles Instructions
Preparing Your Red Velvet Marble Waffles
Prep time for these Red Velvet Marble Waffles is a mere 15 minutes, and the cook time is another 15 minutes, for a total time of just 30 minutes. All you’ll need is a waffle iron and a few basic kitchen tools to get started.
1- Begin by preheating your waffle iron to the desired temperature, typically around 375°F. While it’s heating up, in a large mixing bowl, whisk together the all-purpose flour, cocoa powder, granulated sugar, baking soda, and salt until well combined.
2- In a separate bowl, whisk together the buttermilk, eggs, and melted butter until the mixture is smooth and creamy. Slowly pour the wet ingredients into the dry ingredients, folding gently to incorporate and prevent over-mixing.
3- Once the batter is just combined, it’s time to add the star of the show – the red food coloring. Drizzle in the food coloring and use a spatula to gently swirl it through the batter, creating a mesmerizing marble effect.
4- Lightly grease the preheated waffle iron and scoop the batter onto the hot surface, spreading it evenly. Close the lid and let the waffles cook for 4-5 minutes, or until they’re golden brown and crisp on the outside.
5- Carefully remove the waffles from the iron and place them on a wire rack or plate to cool slightly. Repeat this process with the remaining batter, adjusting the cooking time as needed for your specific waffle iron.
6- Once all the waffles are cooked, serve them warm with your favorite toppings, such as whipped cream, fresh berries, or a drizzle of maple syrup. Enjoy the perfect balance of rich chocolate and vibrant red velvet in every bite!
Pro Tips for Success
- Don’t overmix the batter: Overmixing can result in tough, dense waffles. Gently fold the wet and dry ingredients together until they’re just combined.
- Use chilled buttermilk: Cold buttermilk helps create a light and airy texture in the waffles. You can even chill the mixing bowl and whisk beforehand.
- Experiment with the marble effect: Try swirling the red food coloring in different patterns to achieve unique and visually stunning results.
- Grease the waffle iron well: This will ensure the waffles release easily and maintain their shape.
- Let the waffles cool slightly before serving: This will help them maintain their crisp exterior and fluffy interior.
- Adjust cooking time as needed: Waffle irons can vary in temperature, so keep an eye on the waffles and adjust the cooking time accordingly.
Serving and Storing Your Red Velvet Marble Waffles
Perfect Pairings for Red Velvet Marble Waffles
These Red Velvet Marble Waffles, which serve 8 people, are the perfect breakfast or brunch centerpiece. They pair beautifully with a variety of toppings and accompaniments. Try them with a dollop of fresh whipped cream, a sprinkle of powdered sugar, or a drizzle of warm chocolate sauce for an indulgent treat. For a more balanced meal, serve them alongside crispy bacon, sausage, or a fresh fruit salad.
And don’t forget the beverages! These waffles pair exceptionally well with a steaming mug of hot coffee, a refreshing glass of cold milk, or a tangy glass of orange juice to cut through the richness.
Storage and Make-Ahead Tips
The beauty of this Red Velvet Marble Waffles recipe is that it can be easily made ahead of time or stored for later enjoyment. Once the waffles have cooled completely, you can place them in an airtight container or resealable plastic bag and store them in the refrigerator for up to 5 days.
When you’re ready to serve them, simply pop the waffles in the toaster or oven to reheat and crisp them up. For longer-term storage, you can also freeze the waffles for up to 3 months. To reheat, simply transfer the frozen waffles to the toaster or oven and heat until warm and crispy.
Variations and Dietary Adaptations for Red Velvet Marble Waffles
Creative Red Velvet Marble Waffles Variations
While the classic Red Velvet Marble Waffles are a true delight, there are plenty of ways to put a unique spin on this recipe. Try folding in chopped pecans or walnuts for a delightful crunch. You can also swirl in a cream cheese-based filling for a decadent twist. For a seasonal twist, experiment with adding a hint of peppermint or cinnamon to the batter.
Making Red Velvet Marble Waffles Diet-Friendly
For those with dietary restrictions, there are plenty of ways to adapt this recipe to suit your needs. To make it gluten-free, simply substitute the all-purpose flour with a high-quality gluten-free flour blend. For a vegan version, replace the buttermilk with a plant-based alternative, such as almond or oat milk, and swap the eggs for a flax or chia seed egg replacement. And for a lower-carb option, you can experiment with using a combination of almond flour and coconut flour in place of the all-purpose flour.
Frequently Asked Questions
Q: Can I use regular milk instead of buttermilk?
A: While you can substitute regular milk for the buttermilk, the tangy flavor and tender texture of the waffles won’t be quite the same. Buttermilk is an essential ingredient in this recipe, so it’s best to use it if possible.
Q: How long do I need to cook the waffles?
A: The total cook time for these Red Velvet Marble Waffles is 15 minutes. The recipe calls for cooking the waffles for 4-5 minutes per batch, but the exact time may vary depending on your specific waffle iron. Be sure to keep an eye on the waffles and adjust the cooking time as needed.
Q: Can I make the batter ahead of time?
A: Yes, you can make the batter up to 2 days in advance and store it covered in the refrigerator. Just be sure to give it a good stir before cooking to incorporate any separation that may have occurred.
Q: How many waffles does this recipe make?
A: This Red Velvet Marble Waffles recipe yields 8 servings, with each serving being one full-size waffle.
Q: Why are my waffles sticking to the iron?
A: If your waffles are sticking, it could be due to the iron not being hot enough or not being greased properly. Make sure to preheat the iron thoroughly and use a non-stick cooking spray or brush of oil to ensure the waffles release easily.

Red Velvet Marble Waffles
- Total Time: 30
- Yield: 8 servings
Description
Indulge in the ultimate breakfast treat with these fluffy and irresistible Red Velvet Marble Waffles. The rich, cocoa-infused batter is swirled with vibrant red velvet for a stunning visual appeal, and the waffles are ready in just 15 minutes.
Ingredients
– 2 cups all-purpose flour
– 2 tablespoons cocoa powder
– 1 cup granulated sugar
– 1 teaspoon baking soda
– 1/2 teaspoon salt
– 2 cups buttermilk
– 2 large eggs
– 1/2 cup unsalted butter, melted
– 2 tablespoons red food coloring
Instructions
1. In a large bowl, whisk together the flour, cocoa powder, sugar, baking soda, and salt.
2. In a separate bowl, beat the buttermilk, eggs, and melted butter until well combined.
3. Pour the wet ingredients into the dry ingredients and stir just until combined, being careful not to overmix.
4. Divide the batter in half and add the red food coloring to one half, stirring gently to create a marbled effect.
5. Preheat a waffle iron and grease it if necessary. Scoop the batter onto the hot waffle iron, using about 1/2 cup per waffle.
6. Cook the waffles for 3-5 minutes, or until golden brown and cooked through.
7. Serve the waffles warm, with your favorite toppings such as whipped cream, fresh berries, and a drizzle of chocolate sauce.
Notes
For best results, let the batter rest for 10-15 minutes before cooking the waffles. This helps to develop the gluten and create a lighter, fluffier texture.
- Prep Time: 15
- Cook Time: 15
- Category: Desserts
- Method: Baking
- Cuisine: American
Conclusion
These Red Velvet Marble Waffles are a true masterpiece of breakfast indulgence. With their vibrant hue, rich chocolate flavor, and light, airy texture, they’re sure to become a new family favorite. Whether you’re serving them for a special occasion or just a lazy Sunday morning, these waffles are guaranteed to delight and impress. So, what are you waiting for? Grab your waffle iron and get ready to experience the ultimate red velvet breakfast treat!


